Social Media Tips: 5 easy steps to set up a Facebook business account
I’ve decided to start a Facebook account. Now what?
To start, we need to determine if we are looking to do a business account or a personal account.
Which type of Facebook account is right for you? For the purpose of this blog post, let’s focus on a business account.
If you are going to have a business account, you must start with a personal account. Facebook business pages are similar to personal timelines. A big difference are the analysis tools Facebook includes for business pages that offer in-depth knowledge to help you see how well you are connecting with your community.
Let’s walk together through setting up a page for your business. Please note that the Facebook landscape changes on a regular basis, so remember you can always visit Facebook’s Help Center for updated instructions.
Step #1. Set up your personal Facebook account
First, you are going to need a personal Facebook account to set up a page for your business.
The reason for this is driven by Facebook limiting your availability to access its business account process without an initial personal account.
If there is a silver lining to this, the business page will not interact with your personal page and your personal information is not public on the business page.
Facebook will allow you to switch back and forth from your personal account to your business account so you can interact as the business on the business page and then simply switch back to your personal account.
In addition, the business page is capable of being managed by multiple administrators if needed. Once additional administrators are set up for the page, each administrator can simply log in to their personal Facebook account to access the business page’s control panel.
Step#2. Select “Create a Page”
You can find this in the “More” section at the bottom of your personal account homepage.
Step #3. Select a page
Which page category should you select?
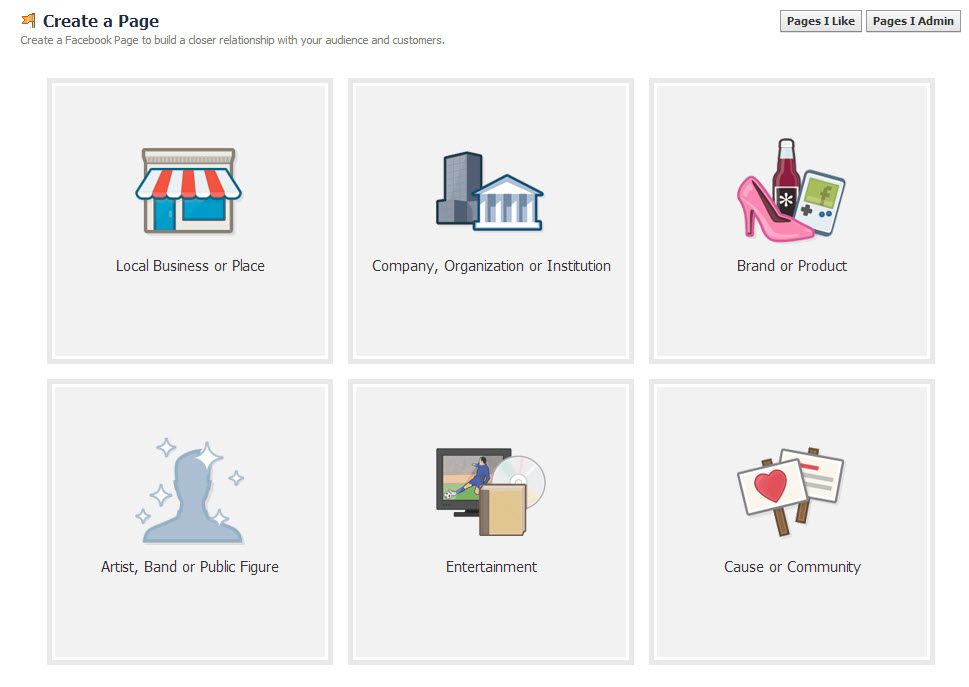
Facebook classifies business pages into six major groups. Here’s a breakdown of each group to help you select the right one for your business.
Local Business or Place
- If you have a brick-and-mortar store where customers physically visit, select the Local Business or Place page.
Company, Organization or Institution
- If your business is mostly run online or has multiple locations, then you should select the Company, Organization or Institution page.
Brand or Product
- If your business has products that are sold through multiple websites, resellers and/or retailers, then you will want to select the Brand or Product page.
Artist, Band or Public Figure
- If you are in the public spotlight and your business is focused on promoting, the Artist, Band or Public Figure page is the appropriate selection.
Entertainment
- If you are looking to promote your television show, movie, book, radio station, magazine or other media, select the Entertainment page.
Cause or Community
- If your organization is a community of action that supports specific issues, campaigns or nonprofit organizations, select the Cause or Community page.
If you feel like you made a mistake in your choice of page, you can always change your page type and category. You can do this after you’ve created the page through the admin control panel.
Step #4. Select your category and get started
The category selection is just a simple category drop-down list.
After choosing a group that best fits your business, enter the required information for your page, read the terms, and if you agree, check the box and click “Get Started.”
Now that your business page is set up, the hard part is over!
Step #5. Create cover and profile photos
Facebook allows for a standardized template design with two elements that can be changed on a regular basis.
These two components are:
- Cover photo
- Profile photo
These elements are essential to the look and feel of your page. They also serve as free advertising space for your business. Let’s take a more in-depth look at each of them.
Cover photos
Cover photos are the large image at the top center of your page that can serve multiple functions.
The size dimensions for cover photos are 850 pixels by 315 pixels.
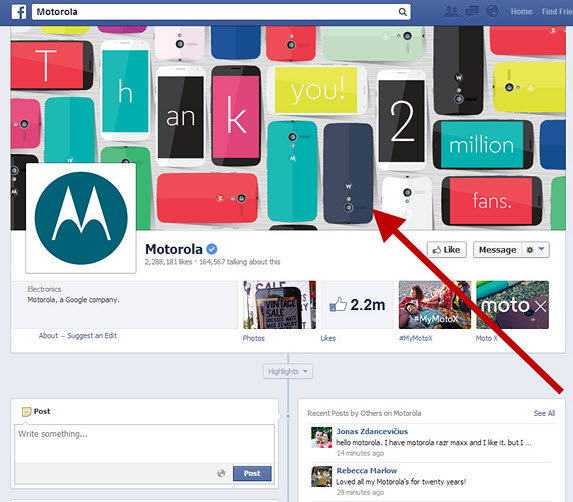
To give you an example, let’s take a look at Motorola’s Facebook page.
Motorola has blended images of its products and text to thank fans for their engagement, which leads me to another point.
Cover photos are versatile and only limited to your creativity. They can introduce visitors to your page, promote special offers, provide contact information, and most importantly, help you set the tone of your page.
Even if you are not a designer or have very limited resources, you can still create effective cover photos.
Freeware like GIMP or Paint.net will allow you to size, crop and save your images as needed.
Also, here’s a tip – try not cover more than 20% of the image with text. The reason is Facebook has been rather picky in the past about the amount of text you can use in images.
I also recommend creating multiple cover photos initially, and then upload and swap them out on a weekly basis.
Creating multiple images is hard enough without adding in the reminder to change the cover photo once per week. However, at the moment, when you change your cover photo, your audience will be able to see that photo in their timeline. Another recent MarketingSherpa blog post dives into the details on Facebook’s EdgeRank algorithm.
But for now, I suggest implementing this tactic as a best practice to keep your brand top-of-mind with your Facebook fans. Also, changing out the cover photo on a regular basis to keep your page looking fresh is a good idea.
Profile photos
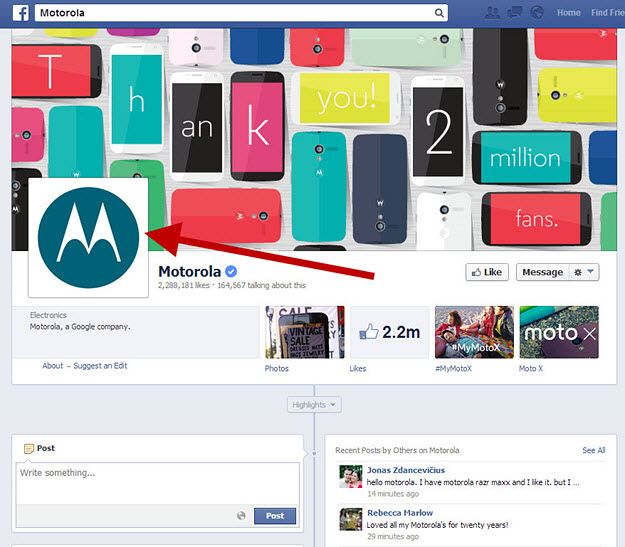
The profile photo is the square box to the bottom left of the cover photo. The dimensions for profile photos are 180 pixels by 180 pixels.
Your profile photo serves one main purpose: every time your page posts an update, your profile photo will appear alongside the post on your fans’ timelines.
The profile photo is a small square, so you will want to minimize the amount of text used in this box to maximize the real estate.
A lot of brands safely use a logo in this space for identity, but there is no right or wrong choice here. As I mentioned earlier, your boundaries are the limits of your creativity.
I recommend taking some time to find the right profile image that captures the heart of your business.
Related Resources:
Get the latest inbound and other marketing case studies and data from MarketingSherpa delivered straight to your inbox
Social Media Marketing: A quick look at Facebook EdgeRank


